How to Effectively Select LED Tape- Part 1
February 22, 2024
By Jeffrey Dross
Since its introduction about a decade ago, LED Tape has become an almost ubiquitous element of lighting design.
When introduced, it was the first LED lighting product that was less expensive than the legacy product it replaced. Festoon lamp based liner lighting soon disappeared. (Good riddance! What a horrible product!) LED tape prices continued to drop and wider varieties and options were soon added. The market is now filled with a massive array of LED Tape, such that a very frequent question is the title of this post. “How do I effectively buy or specify LED Tape?” Put as simply as possible, I recommend using four factors in the decision. Color, output, placement demand, and run lengths.
I originally thought I could cram all of this into a single post, but the more I wrote, the more I realized readers might be better served if I went a bit deeper into each section. Part One will cover placement. The next post, Part Two, will complete information and discuss color, output, and run lengths.
Placement Demand
Since I began this blog, I have periodically provided some suggestions for LED Tape placement. Avoiding many of the reasons and some detail, I’ll quickly recap my location suggestions for a group of the most popular and emerging uses.
- Above Cabinets- Place the tape 3″ from the front edge of the cabinet. Follow the full perimeter edge if variations in depth are present. Place tape on the side of the cabinet, to the wall, if there is a break in continuity of the cabinet run. (i.e. a doorway, appliance or room entrance)
- Above Cabinet Alternative (Installed as black-lighting or to highlight a wall)- Run a straight line of tape along the BACK of the upper cabinet 3″ to 6″ from the wall the full length of the upper cabinets.
- Inside the Cabinet WITH Front Fascia- Mount the LED Tape on the inside of the fascia faced into the cabinet on the hinge side. Tape should be run from the top to the bottom. If more light is desired, or if the cabinet is wide, mount a strip on both sides.
- Inside Cabinet WITHOUT a Front Fascia- Mount the LED Tape on the hinge side wall perpendicular to the door surface. Tape should be run top to bottom. Try to avoid using a run on the handle-side of the cabinet. When the cabinet is opened; it could be too blinding. If additional light is needed in this type of cabinet design AND shelves are translucent, consider a strip along the top. While it will be seen when the door is opened, it will likely be far enough out of sight and cause only minimal glare issues.
- Under Countertop- A 1/2″ wide by 1/16″ to 1/8″ deep router about 1/2″ from the front edge of the countertop will accommodate most every tape option. Surface depth of counter might need to be increased. If an ogee edge is used, fabricators have told me that the router cut might start where the full thickness of the material starts. This may require an even larger surface depth. My experience indicates that a granite, marble and quartz stone routered groove may be more problematic than Formica, Corian and concrete. Always review with the countertop fabricator. Don’t forget the “mouse hole” that allows the wire to enter inside the cabinet!
- Under Countertop Alternate- If the space between top of the lower cabinet doors and the underside of the countertop is sufficient, the LED Tape can be mounted on the underside surface in a channel without a router. If this option is considered, always check the door swing clearance.
- Under Island- Run the tape the full length of the island overhang installed about 9″ from the chairside front edge of the island top.
- Toekick- Run the LED Tape along the center of the toekick space. Remember, do not place toekick lighting in front of appliances. Instead, use an extension around the sides of the cabinet and behind the appliance opening so there will be no issue removing the appliance for cleaning or servicing.
- Cove- Mount the LED on the wall, just below the front edge of the cove material height.
- Cove Alternative- Mount the LED on the front edge of the cove material aimed inward toward wall or at the bottom of the cove aimed upward to the ceiling, depending on the desired lighting effect.
- Drop Ceiling- Mount the LED Tape on the end of the drop panel, about 2″ from the edge, aimed up.
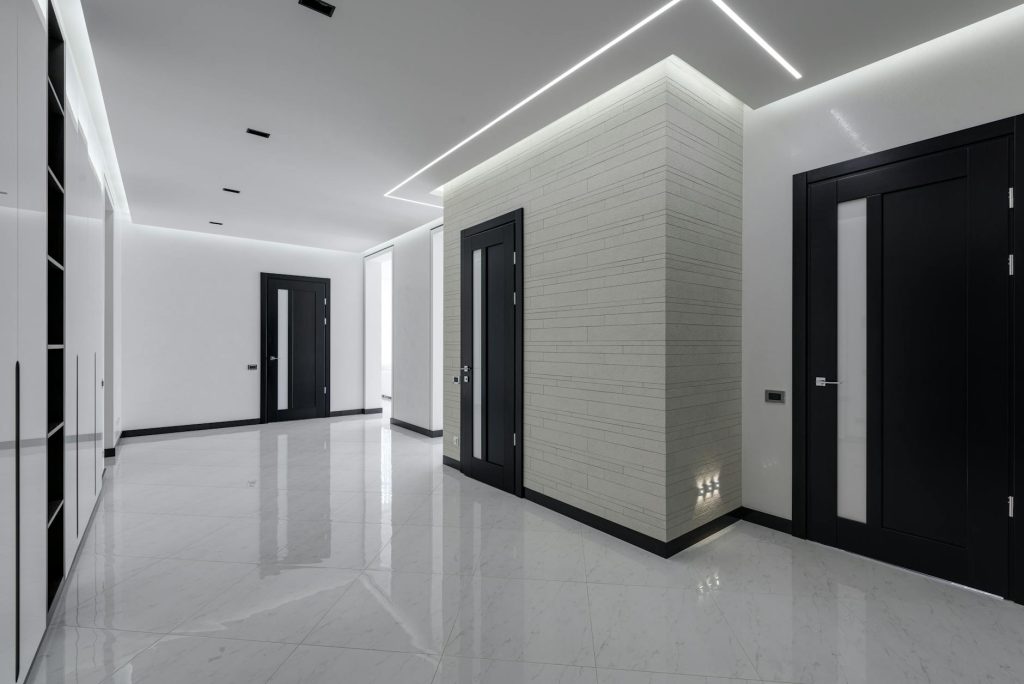
Photo by Max Rahubovskiy on Pexels.com
Tray Ceilings
There are countless versions of tray ceiling construction. Adding LED Tape here is easy, but rather than providing ten locations, let me provide a few thoughts.
- Unless using an LED Tape aluminum extrusion where the visible light becomes a part of the design, try to avoid seeing the LED light. Place them behind barriers of forward enough so direct sign is impossible.
- Be careful with corners. Linear light that intersects at boxed corners will deliver add lines and shadows that some people like and others dislike. If you think this could be an issue, test the output prior to finished installation. One option is to cut the tape short of the corner to reduce some of the light patterns you might dislike. Mounting the tape on a different surface will also change the light/shadow patterns.
- To connect LED Tape corners, a corner-connector is used. Be careful with the wire! It can also lead to odd shadows. Use electric tape to affix the connector wires to the mounting surface so it will not rise above the light.
- Cove extrusions mounted inside a simple tray construction are a nice way to achieve the same effect with less complex tray framing.
Aluminum Extrusions Aided Placement
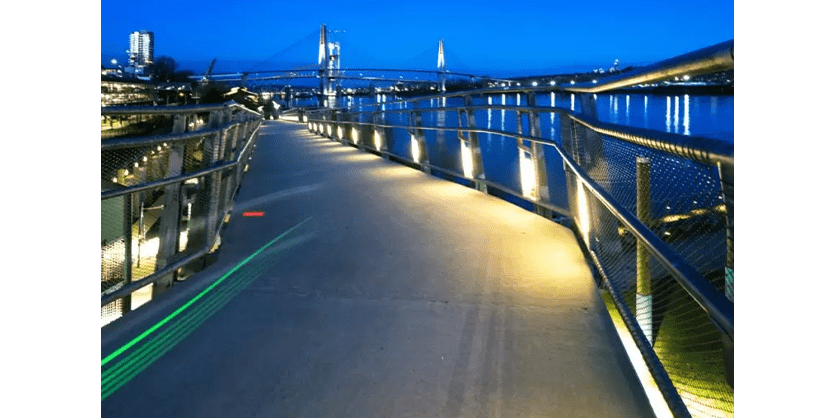
Shortly after the creation of LED Tape, installers and designers realized that new and exciting ideas could be realized with the assistance of aluminum extrusions. A row of LED Tape ( or two, or thee, or six, depending on the extrusion size!) is adhered to the inside of the aluminum. Most have matching diffusers. These combinations have unleashed an avalanche of exciting installation options.
- Drywall deep light designs in wall and ceilings
- Inside and outside (drywall) corner illumination
- Wall wash ceiling perimeter lighting
- Tray ceiling edge lighting (see above)
- Step tread lighting
- Stair rail lighting\Lighted baseboard perimeters
- IP rated floor lighting installation
The combination of extrusions that accommodate various quantities of LED Tape and a little creativity has allowed these options to change interior lighting design.
LED Tape Used in Under-Cabinet Kitchen Applications
The old, self-contained under-cabinet lights used to deliver between 200 and 400 lumens per foot. Because they contain 1,2,3 or 4 individual lamps, they were also somewhat spotty. There is virtually no reason to use them any longer. LED Tape is a simple channel or in a stylish aluminum extrusion can service the same need, deliver even light across the full length of the countertop AND save a fair amount of money. The only question that needs resolution, Can the installation accommodate the required remote power supply? Perhaps it is located in the attic, at the top of the upper cabinets with low-voltage wire traveling to the tape. Determine power placement as carefully as the lighting for the best results.
Once power supply location is resolved, how much light is the right amount of light? When deciding, I ask about the cooking practices of the owner. Are they a gourmet chef, “Heat-n-Serve” cook or a Door Dash practitioner? With that information known, good decision can be made.
- The gourmet will need plenty of high quality light and it will be used for many hours. Specify the highest lumen per foot options (500+ lumens per foot) from the most reputable manufacturer.
- The “Heat-n-Serve” cook needs light, but will be opening cans and ripping envelops to mix up a quick meal. The mid-range numbers will serve them well. Find 250 to 400 lumens per foot tape.
- When countertops are only used to read online menus and find pizza delivery numbers, there is no need to invest in expensive under cabinet lighting. The low lumen output product is fine. Spend the savings on better island pendants!
Lastly, ALWAYS use an extrusion on wood, at a minimum, the low-priced plastic option, when installing LED Tape to the underside of a cabinet. The double-back tape, even the high quality 3M is no match for raw wood. The wood will pull moisture from the tape and before you know it, a sag will occur.
Occasional Demand Use
The client wants to light an area that is used only on birthdays, Halloween and the end of year holidays. If this is the case, consider using some of the readily available “budget” LED Tape options on the market. They are cheap, they may not last 40,000 hours, but for the occasional use, they could be just what is needed. Again, save money and spend it elsewhere. Conversely, this budget product might be enticing to use everywhere. Don’t do it! It is budget priced for a reason! It will likely fail to withstand the demands of continual use; might have subpar color rendering and the double-sided tape will almost certainly not last.
Published with the permission of the author, Jeffrey Dross. First published How to Effectively Select LED Tape – Part One – Lighting by Jeffrey
Jeffrey Dross is an internationally known lighting expert with the ability to translate complex topics into easy-to-understand solutions. He has an educational background in Architecture, employed in the residential lighting field since 1974 with time spent in Engineering, Product Management, Graphics, QA and Production. Experience with Chinese factories and doing business in Asia since the 1980s. Numerous educational talks about trends, introductory LED lighting and outdoor living. Numerous interviews with the media covering all of these topics. He is based in Cleveland, OH.